How To: Receiving a Single Purchase Order (RF-01-01)
Overview
This tutorial describes how to receive a purchase order using an RF scanner.
Step-by-Step
- Enter the log number in the ‘Log #’ field.
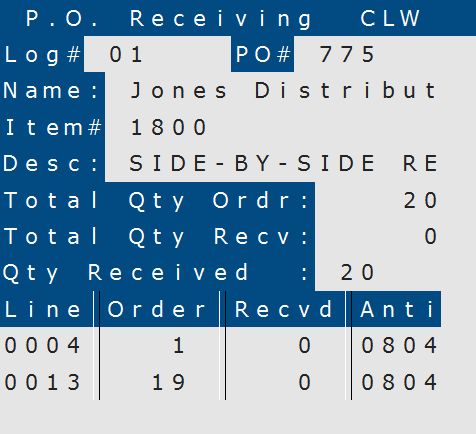
- Scan or enter the purchase order number in the ‘PO #’ field.
- The vendor name appears in the ‘Name’ field and the cursor moves to the ‘Item #’ field.
- Scan or enter the first item from the purchase order.
NOTE: If you scan/enter a barcode or item number that is not on file, the following prompt appears:
‘UPC# not found. Enter the Item# for the UPC.’
Enter the item number, not the barcode number, for the item you are trying to receive. When a valid one is entered, one of the following happens:
- If the ‘RF-Disallow Scan of Barcode When Invalid Item # is Entered’ preference in P/O Preferences (04-90) is set to ‘Y’, the item is received.
- If the ‘RF-Disallow Scan of Barcode When Invalid Item # is Entered’ preference in P/O Preferences (04-90) is set to ‘N’, the system asks you to ‘Rescan the UPC# again.’ After you rescan or enter the barcode, the item is received and that barcode is assigned to the item in Inventory Master (03-01). While this is a convenient feature, if you are not careful, it can result in the barcode being assigned to the wrong item number.
- The item description appears in the ‘Desc’ field, as well as the quantity ordered and the quantity received (the quantity received will be zero until the process is finished).
- In the ‘Qty’ Received’ field, enter the quantity of items received on the purchase order. Then press Return.
- Repeat Steps 4-6 until all items are received.
