How To: Maintaining the Status of a Locator Item (RF-04-02)
Overview
The selection is used to change the status of a locator item (statuses ‘A,’ ‘F,’ ‘D,’ ‘M,’ ‘O,’ and ‘L’ only).
Step-by-Step
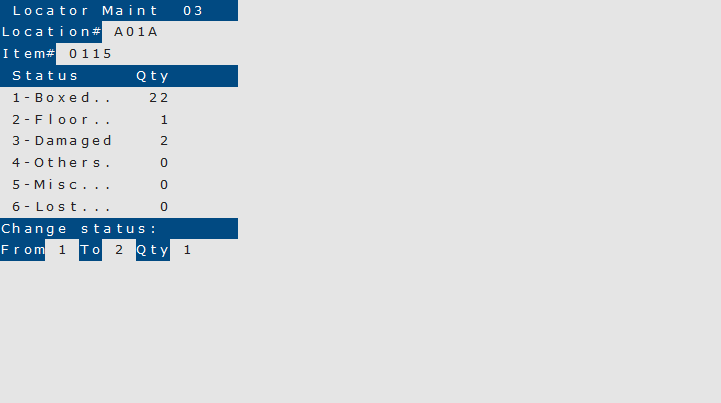
- In the ‘Location#’ field, scan or enter the location number belonging to the item you want to maintain.
- Scan or enter the item number in the ‘Item#’ field.
The following statuses for the item display:
Status
Description
Boxed
An item with this status is available for sale.
Floor
An item with this status is available for sale as a floor model item. To sell an item with this status, you must first select ‘Floor’ from the ‘Type’ drop-down list on the POS Entry Detail tab.
Damaged
An item with this status is available for sale as a floor model item. To sell an item with this status, you must first select ‘Floor’ from the ‘Type’ drop-down list on the POS Entry Detail tab.
Others
This status is used when you want to know where an item is, but you don’t want it available for sale.
Misc
This status is used when you want to know where an item is, but you don’t want it available for sale.
The ‘Other’ and ‘Miscellaneous’ statuses are basically the same. Both should be used for your company specific purposes.
Lost
This status is used to designate any quantities of the item that have been placed in a non-specific place. Items with this status are not available for sale.
NOTE: Each status is assigned a number, which will be used in the next two steps.
- In the ‘From’ field, enter the number corresponding to the status that you are changing.
- In the ‘To’ field, enter the number corresponding to the new status.
- In the ‘Qty’ field, enter the number of items that you are changing to the new status.
- Press Tab to apply the changes.
