How To: Searching By Customer Number (06-31)
Overview
This tutorial describes how to search GUI Customer History Inquiry by customer number.
Step-by-Step
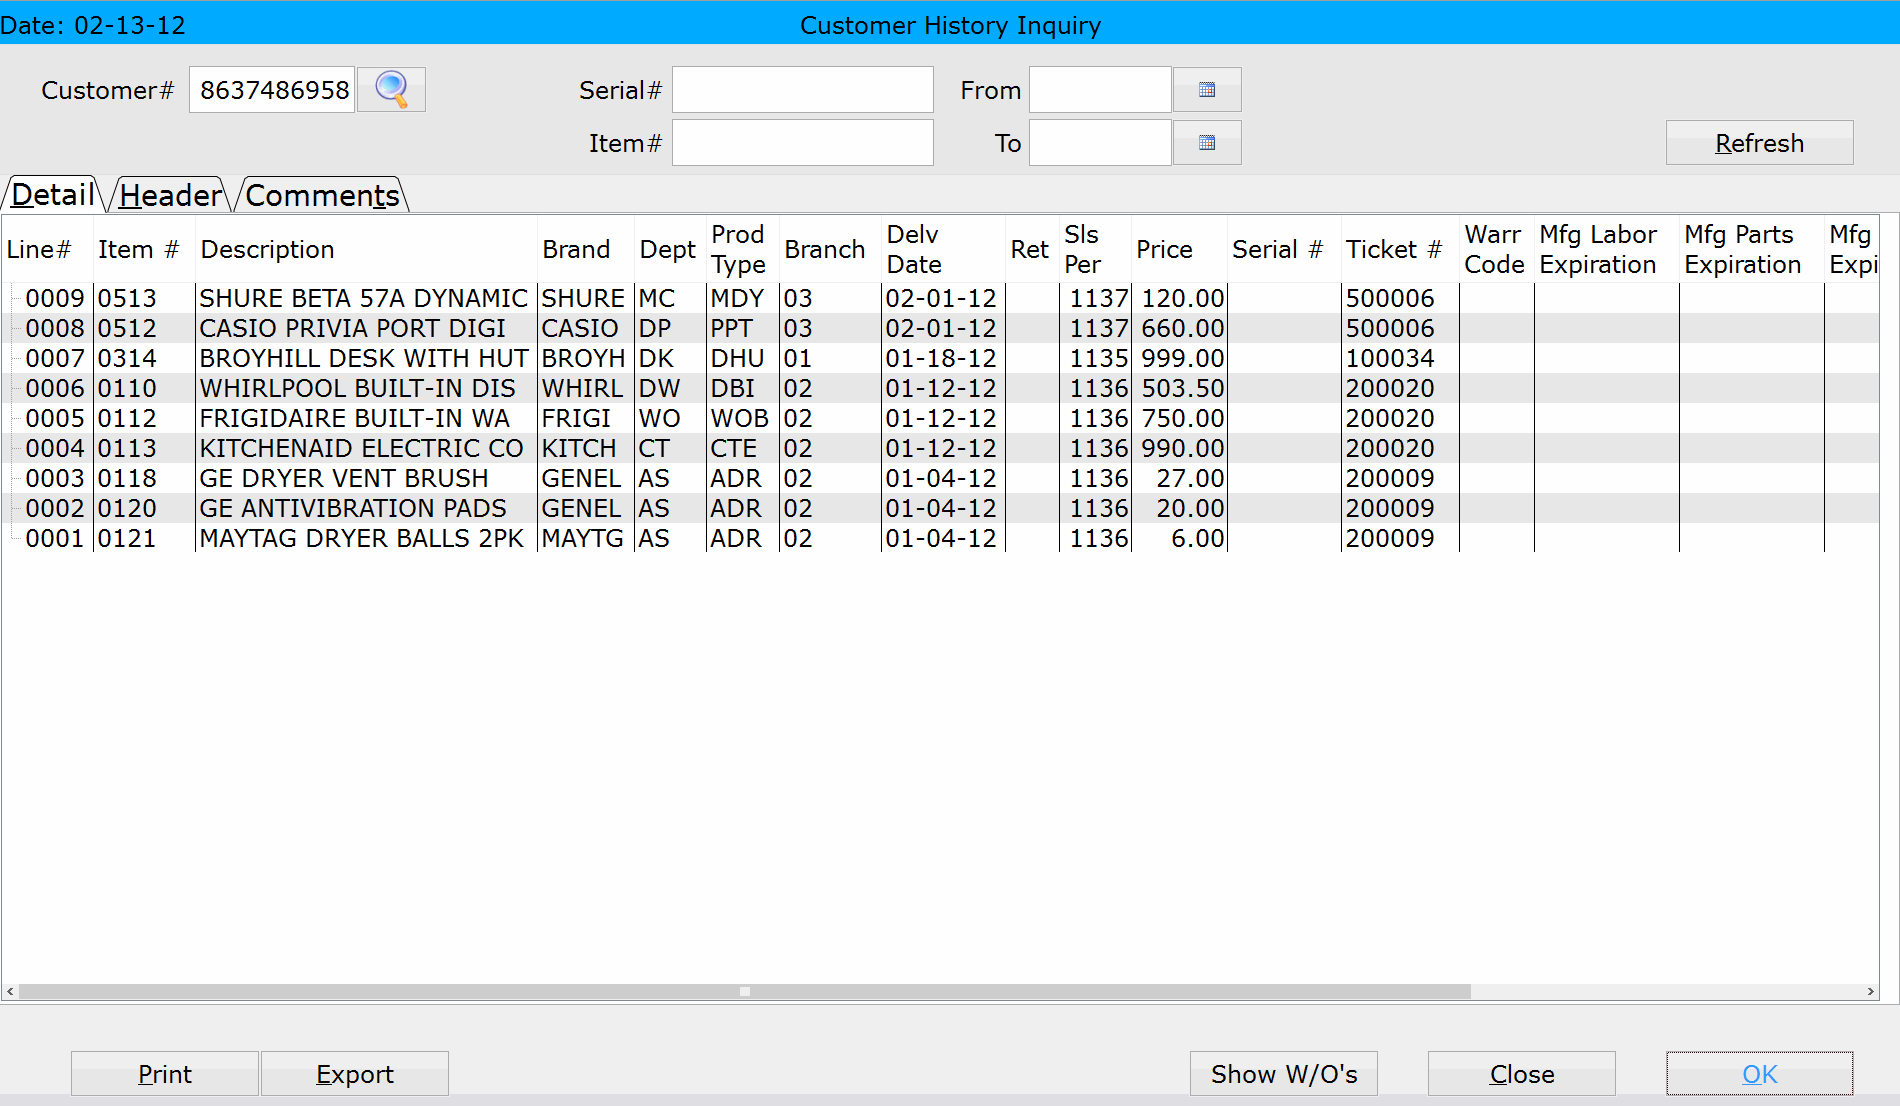
- In the ‘Customer#’ field, enter the customer number for inquiry.
- Click the Search button to look up a customer number.
- If you want to narrow the search by serial number, enter it in the ‘Serial#’ field.
- To filter the search by item number, enter it in the ‘Item#’ field.
- If you want to run the report for a specific date range, enter the dates in the ‘From’ and ‘To’ fields.
- Click Refresh.
- Whenever the search criteria changes, you must click the Refresh button to update the search results.
- Sales transactions for the customer appear.
- To view more information about an individual transaction, click the ticket number (‘Ticket#’ field). A new screen appears where you can view the Header, Detail, and Customer information for the transaction along with the Special Instructions and Payment History. Additionally, by clicking Print, you can print a copy of the invoice. Click Exit to return to the Customer History Inquiry screen.
- On the Customer History Inquiry screen, click the ‘Header’ tab to view the customer information (Name, Address, Phone, etc).
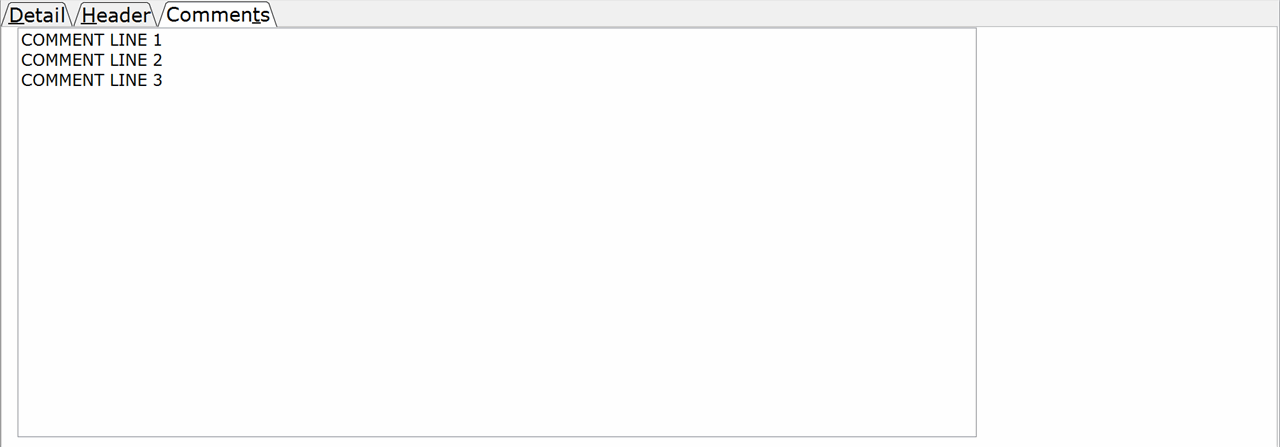
- Click the ‘Comments’ tab to view any comments attached to the customer record.
- You will notice that a plus (+) sign appears to the left of the Line# for items that are attached to a workorder. You can view the workorder information for an individual line by clicking the plus sign (and hide the workorder information by clicking it again). To view the workorder information for all lines on the screen, click the Show W/Os button. To hide all workorder lines, click the Hide W/Os button.
- click the workorder number (W/O#) to view the workorder in Service Department Automation.
- click the ticket number (Ticket#) to view the sales transaction that was created from the workorder.
When the workorder line appears, there are a couple of options. You can:
- Click the Print button to print a report of the information on the screen. You can print to a laser printer or PDF file (by entering “PDF”).
- Click Export to save the information on the screen to a .csv file.


