How To: Running the Commission Inquiry (02-28)
Overview
This tutorial describes how to run the Commission Inquiry.
Step-by-Step
NOTE: You can limit the information shown on this inquiry further through the Inquiry tab on the Commissions Preferences selection (02-90-01).
- Enter your Employee Number.
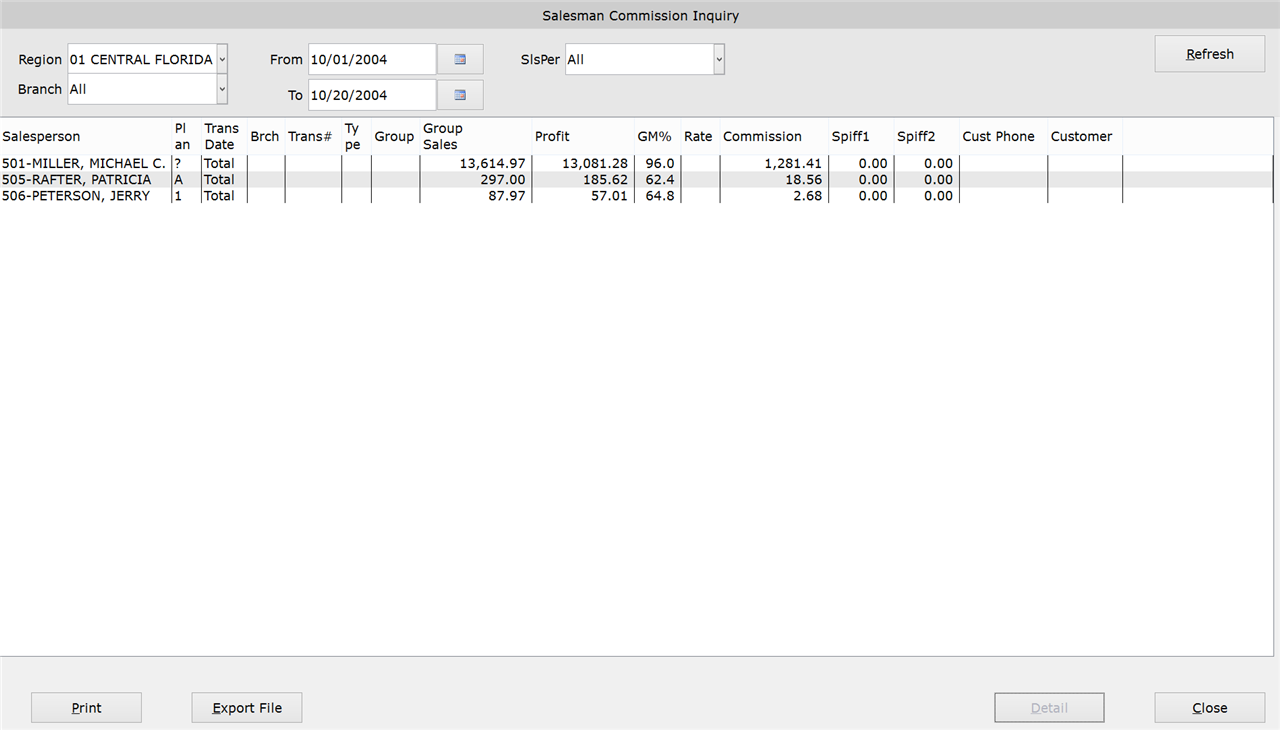
- From the ‘Region’ drop-down menu, select a region to narrow the results by.
- From the ‘Branch’ drop-down menu, select a branch to narrow the results by. You can include all branches by leaving this field set to ‘All.’
- In the ‘From and To’ fields, enter the date range for the listing or select it from the calendar. Today’s date appears by default.
- From the ‘Salesperson’ drop-down menu, select a salesperson to narrow the results by. You can include all sales people by leaving this field set to ‘All.’
- Click ‘Refresh.’
- Any time you change the search criteria, you will need to click ‘Refresh’ to update the results.
- Click ‘Detail’ for a detailed view of the commissions, showing all the salesperson’s transactions for the date range. This view breaks down the salesperson by group and displays additional information in the columns, including group sales.
- Click ‘Summary’ to return to the summary view.
- Click the ‘Print’ button to print a paper copy of the report (optional). At the prompt, enter the ID of a physical printer, or enter “PDF” to save the report to a PDF file. If printing to a PDF, accept the pre-prompted save location on your computer, or enter a new one.
- Click ‘Export File’ to download the report to your computer (optional). Accept the pre-prompted save location, or enter a new one. Then click ‘Ok.’

