How To: Using Optional Columns (05-41-11)
Overview
This tutorial describes how to use the Optional Columns feature of the Sales by Customer report.
NOTE: This option is only available on Non-POS terminals.
Step-by-Step
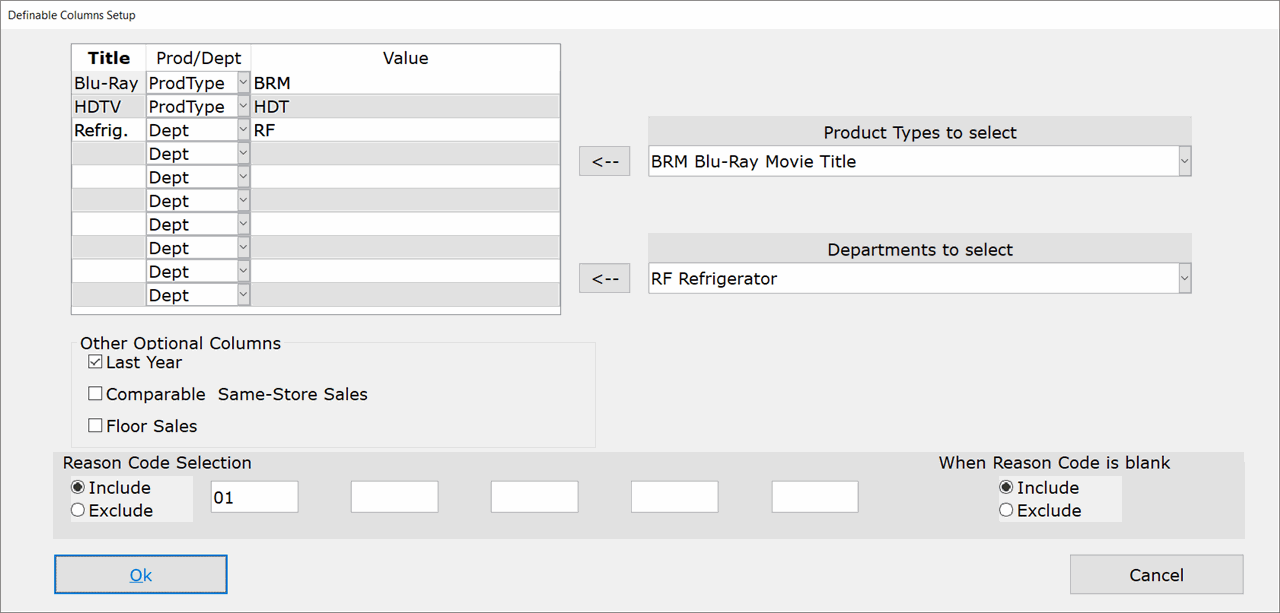
- Click the ‘Define Columns’ button at the bottom of the Sales by Customer screen. The Definable Columns Setup window appears.
- Check the Last Year box to compare sales from this year to sales from the same time last year.
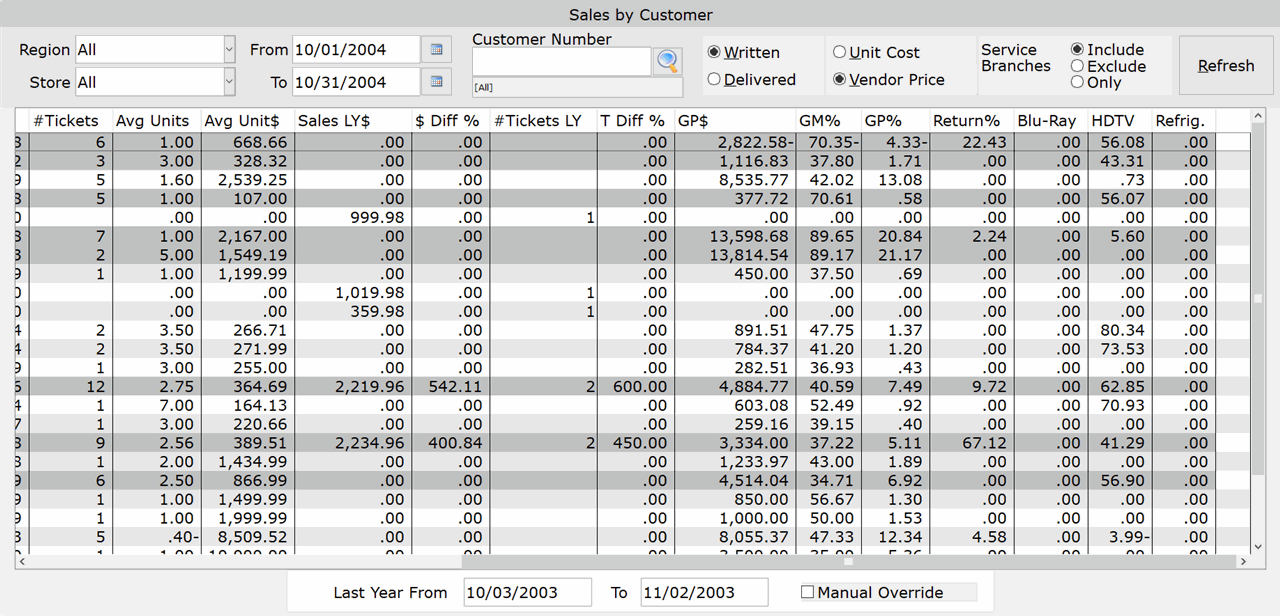
When you check this box, click ‘Ok’ and then refresh the report, four new columns are added (see the Field Definitions section for details):
Sales LY $
$ Diff %
# Tickets LY
T Diff %
Notice that the box at the bottom of the main screen shows the date range to which this year’s figures (the current date range) are being compared. By default, the system uses the same fiscal time period from last year instead of the same actual dates. To change the date range, enter the dates in the appropriate fields, check the ‘Manual Override’ box and click Refresh.
- Check the Comparable Same-Store Sales box to include only stores that were open last year.
- Check the Floor Sales box to show the percentage of all sales for the branch, that is comprised of Floor Model items.

