How To: Viewing & Printing the Income Statement (15-24)
Overview
This tutorial describes how to view and print G/L income statements.
Step-by-Step
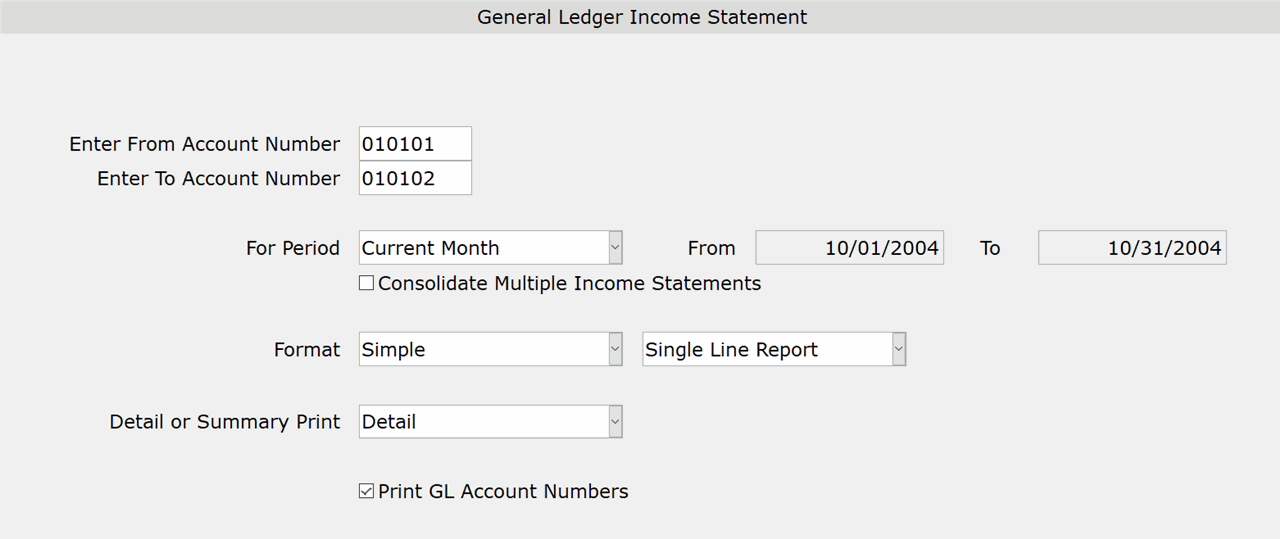
- In the ‘Enter From Account Number’ and ‘Enter To Account Number’ fields, enter the range of accounts (first six digits of the G/L number) for which income statement(s) are being printed. Leave the ‘Enter From Account Number’ field blank to start with the first G/L number on file. Leave the ‘Enter To Account Number’ field blank to end with the last G/L number on file.
- From the ‘For Period’ drop-down list:
- Select ‘Current Month’ to view income statement(s) for the current G/L month. The dates appear in the fields to the right and cannot be changed.
- Select ‘Current Quarter’ to view income statement(s) for the current G/L quarter. The dates appear in the fields to the right and cannot be changed.
- Select ‘Prior Month’ to view income statement(s) for the prior G/L month. The dates appear in the fields to the right and cannot be changed.
- Select ‘Prior Quarter’ to view income statement(s) for the prior G/L quarter. The dates appear in the fields to the right and cannot be changed.
- Select ‘Same Month Last Year’ to view income statement(s) for the same G/L month last year (e.g. If the current G/L month is September 2016, the income statement(s) will print for September of 2015). The dates appear in the fields to the right and cannot be changed.
- Select ‘Same Quarter Last Year’ to view income statement(s) for the same G/L quarter last year (e.g. If the current G/L quarter is Quarter 3 of 2016, the income statement(s) will print for Quarter 3 2015). The dates appear in the fields to the right and cannot be changed.
- Select ‘Enter’ to specify a date range for the income statement(s).
In the ‘From’ and ‘To’ fields to the right, enter the date range for the income statement(s). The ‘From’ date must be the first day of the month/period and the ‘To’ date must be the last day of the month/period.
NOTE: You cannot select dates that span more than one fiscal year.
- At the ‘Consolidate Multiple Income Statements’ option:
- Check the box to view a consolidated income statement for the selected accounts. With a consolidated statement, information for all selected accounts is combined on a single statement.
- Leave the box unchecked to view separate income statements for each account. Skip to Step 5 of this tutorial.
- When the ‘Consolidate Multiple Income Statements’ box is checked, the ‘Title and Format Codes from Group’ field appears. ‘ZZ’ (ZZ0000) is the default Tyler grouping that is used for consolidated income statements. If your company uses a different group for this purpose, enter the first two digits of the group in this field.
Please see the Setup Instructions for more information.
- In the ‘Format’ field:
- Select ‘Simple’ to view the report in simple format, which includes information for the selected period, along with YTD amounts.
Next, in the field to the right, select whether you want to view the statement in ‘Single Line Report’ or ‘Multi-Line Report’ format. Multi-Line spreads the information over multiple lines. The year to date amounts are limited to $999,999,999.99 for Single Line format, and $999,999,999,999.99 for Multi-Line format.
- Select ‘Complex’ to include comparable information from last year on the income statement(s). Budget amounts, along with Prior Year MTD and Prior Year YTD amounts appear on the income statement(s).
Next, in the field to the right, select whether you want to view the statement in ‘Single Line Report’ or ‘Multi-Line Report’ format. Multi-Line spreads the information over multiple lines. The year to date amounts are limited to $999,999,999.99 for Single Line format and $999,999,999,999.99 for Multi-Line format.
- Select ‘Month by Month’ to view information for the selected period along with information for previous months.
In the field to the right, select ‘Last 12 Months’ to include information for the previous 12 months or select ‘Current Fiscal Year’ to include information for previous months in the current fiscal year.
- From the ‘Detail or Summary Print’ drop-down list:
- Select ‘Detail’ to include all income statement accounts.
- Select ‘Summary’ to include accounts with a transaction code of 0, 1, 2, 3, or 6. Accounts with a transaction code of 4 are not included.
- Check the ‘Print GL Account Numbers’ box to include G/L Account Numbers on the income statement(s).
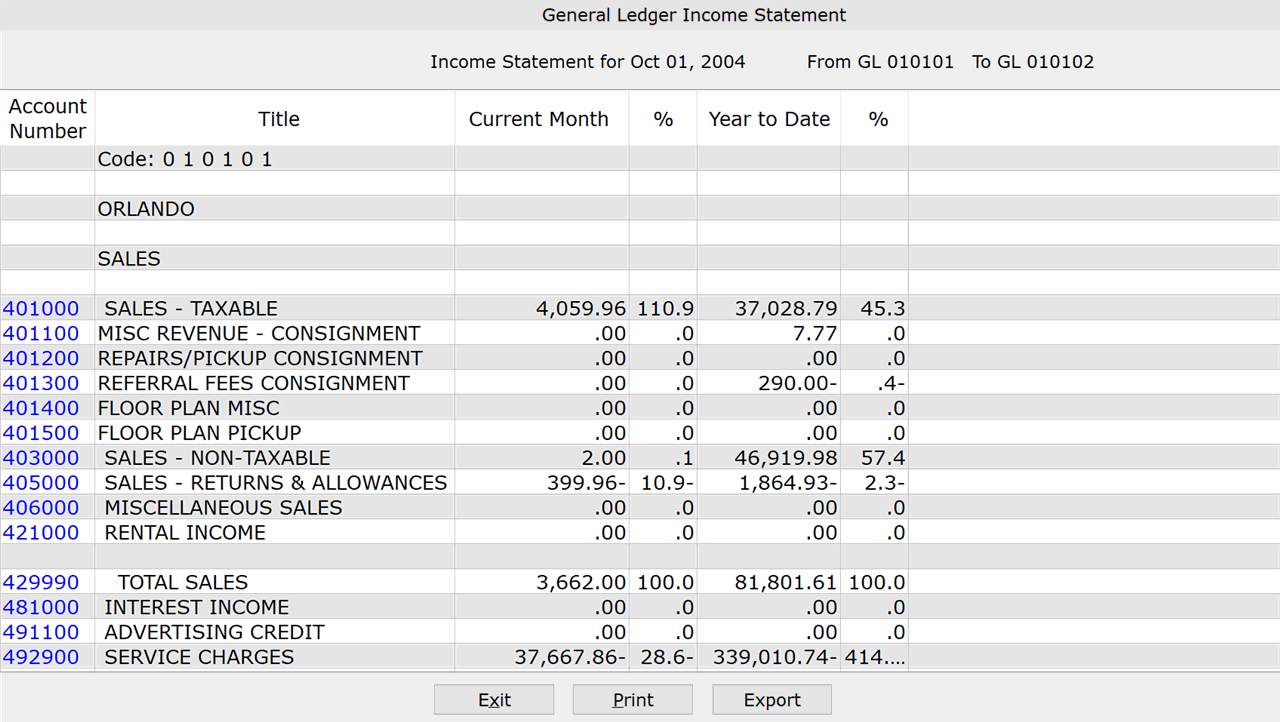
- Click ‘Done’ and the income statement(s) appear.
- Click ‘Print’ to print a paper copy of the income statement(s).
At the ‘Do you want to include alternate row highlighting on the report’ prompt:
- Click ‘Yes’ and every other row will print on a darker background.
- Click ‘No’ and all lines will print on a white background (this option saves ink on a laser printer).
At the ‘Select Printer’ prompt, enter the ID of a physical printer, or enter “PDF” to save the income statement(s) to a PDF file. If printing to a PDF, accept the pre-prompted save location on your computer, or enter a new one.
- Click ‘Export’ to open the income statement(s) directly in Excel (and also save it to your computer).
IMPORTANT: In order for the income statement(s) to open directly in Excel (and be saved to your computer), the ‘General Ledger’ directory must be set up in Company/PDF Export (30-04) and/or By Term Company/PDF Export (30-05). If a ‘General Ledger’ directory is not specified in one of these selections, complete that process before exporting.

