How To: Adding a New Non-Inventory Branch (30-02-02)
Overview
This tutorial describes how to add a new Non-Inventory branch in Branch Maintenance.
Step-by-Step
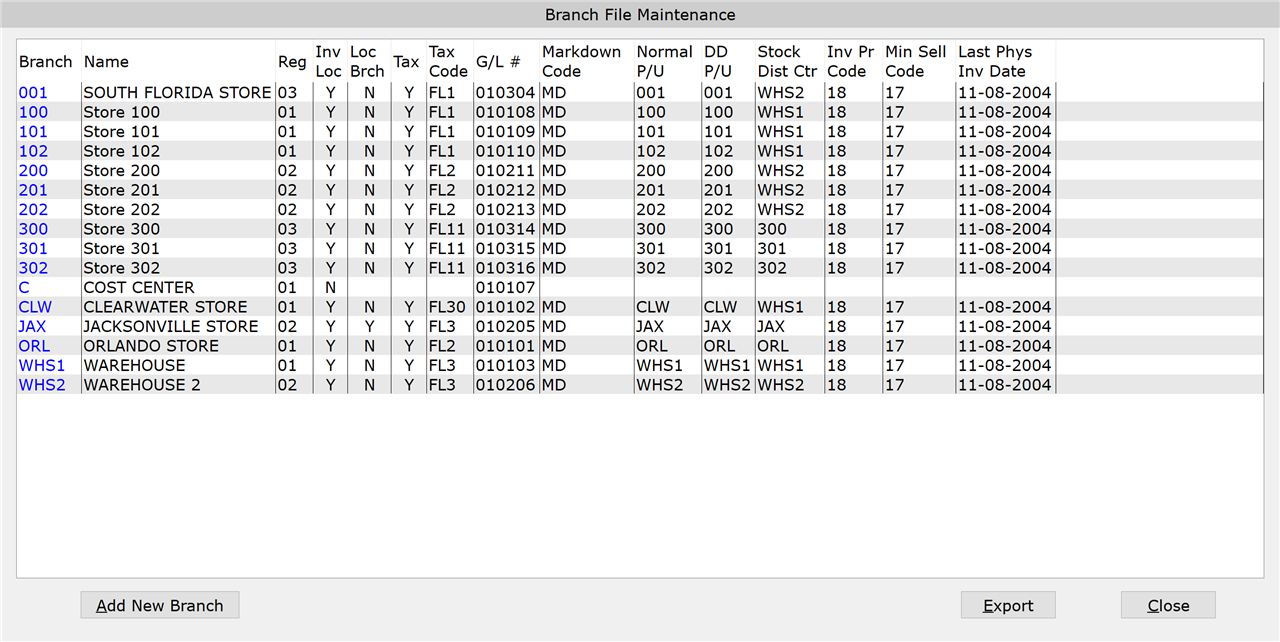
- Click the ‘Add New Branch’ button.
IMPORTANT: You can only add Non-Inventory locations. Inventory locations must be added by Tyler. Contact us at (727) 536-5588 or 800-237-5913.
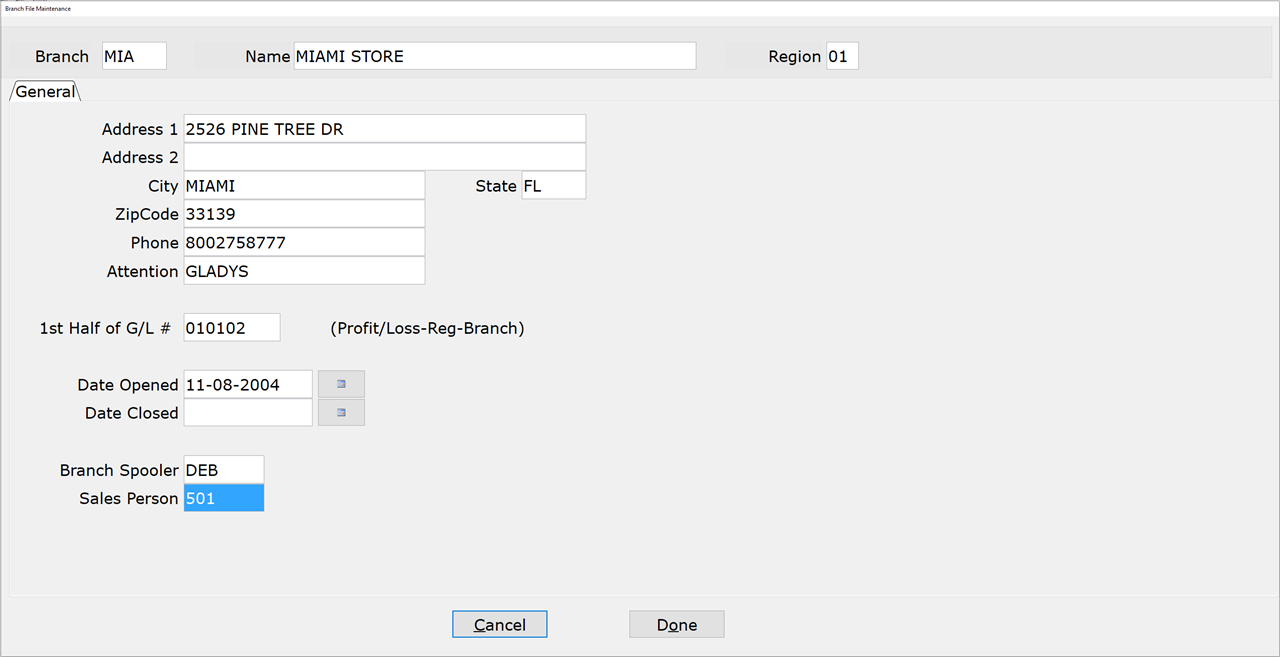
- Complete the necessary fields on this screen:
- The Salesperson (Employee) ID associated with the entered User ID will pre-prompt in the ‘Salesperson #1’ field of Point of Sale Entry.
- Type the word “BLANK” in this field and no Salesperson ID will appear in ‘Salesperson #1’ field.
Branch
Enter a Branch ID. This field is a maximum of 4 alphanumeric characters, which should not include special characters such as %, &, #, etc. It can be as simple as ’01’ or represent the city or area e.g. ‘EHAM’ for East Hamilton.
Name
Enter the full name of the branch.
Region
Enter the region code for this branch.
Address 1
Enter the first line of the address of the store.
Address 2
Enter the second line of the address for the store (if applicable).
City
Enter the city in which the branch is located.
State
Enter the state in which the branch is located.
ZipCode
Enter the zip code for this store.
Phone
Enter the primary phone number for this branch.
Attention
Enter name of the person in charge of this branch, if applicable.
1st Half of G/L #
Enter the first six digits of the General Ledger (GL) number for this branch (required). The first two digits of the GL number determine whether the branch is a profit center (01) or a cost center (02). The third and fourth digits represent the region number, and the fifth and sixth digits are the branch number.
We suggest that you assign each branch a different branch number, even if the branches are located in different regions.
Refer to the Overview section of the General Ledger documentation for more information on GL numbers.
Date Opened
Enter the date that the store opened for business.
Date Closed
Enter the date the store was closed for business, if applicable. When a date is entered here, the branch will no longer appear in Status Inquiry (02-01).
Branch Spooler
Enter the print spooler assigned to this branch.
Sales Person
Enter the default salesperson ID. The salesperson entered here appears in the ‘Sales Person #1’ field of Point of Sale Entry (02-02).
Leave the field blank and no salesperson will appear in the ‘Sales Person #1’ field.
If User ID is turned on:
- Click ‘Done’ to save the new branch.

