How To: Running the Pending Transfer Audit (03-11-20)
Overview
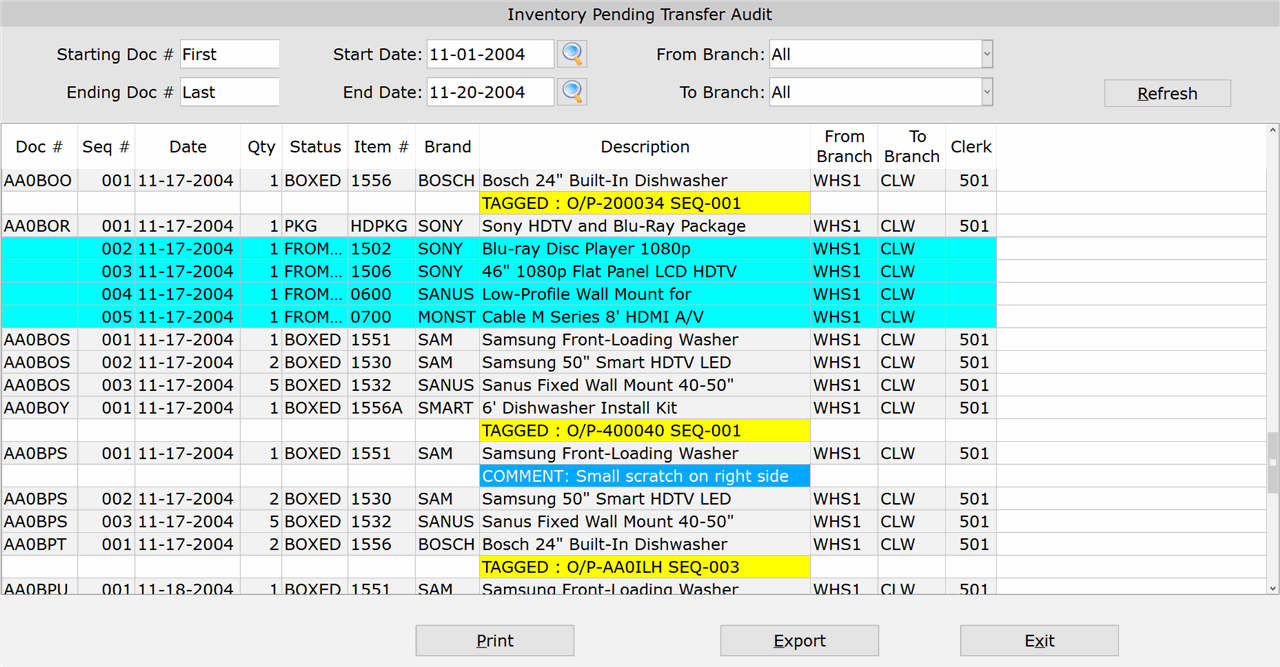
This selection is used to view a report of all items that have been entered on a transfer, but not yet confirmed through Shipping Confirmation (03-11-13).
NOTE: To access this selection, the ‘Activate Request for Transfer’ preference must be set to ‘Y’, in Transfer Preferences (03-11-90-01).
Step-by-Step
- In the ‘Starting Doc #’ field, enter the transfer document number to start the report with. Leave the field set to ‘First’ to start the report with the first transfer document on file.
- In the ‘Ending Doc #’ field, enter the transfer document number to end the report with. Leave the field set to ‘Last’ to end the report with the last transfer document on file.
- In the ‘Start Date’ field, enter the starting date for the report or select it from the calendar. Transfers with a date on or after this date will be included on the report. Leave the field blank to start the report with the earliest date on file.
- In the ‘End Date’ field, enter the ending date for the report or select it from the calendar. Transfers with a date on or before this date will be included on the report. Leave the field blank to end the report with the latest date on file.
- In the ‘From Branch’ field, enter the From Branch (Outbound Branch) for the report. Only transfers with this From Branch will be included on the report. Leave the field set to ‘All’ to include transfers with any From Branch.
- In the ‘To Branch’ field, enter the To Branch (Inbound Branch) for the report. Only transfers with this To Branch will be included on the report. Leave the field set to ‘All’ to include transfers with any To Branch.
- Click the ‘Refresh’ button to display the report results.
- Whenever the search criteria changes, you must click ‘Refresh’ to update the report results.
- Click the ‘Print’ button to print a paper or digital copy of the report (optional). At the ‘Select Printer’ prompt, enter the ID of a physical printer, or enter “PDF” to save the report to a PDF file. If printing to PDF, accept or modify the filename and click ‘Ok.’
IMPORTANT: When printing to PDF, you must have a ‘Inventory Transfers’ folder specified in Company PDF/Export Directory (30-04) or By Term PDF/Export Directory (30-05) in order for the PDF to save successfully to your computer.
- Click ‘Export’ to open the report directly in Excel and also save it to your computer (optional).
IMPORTANT: You must have a ‘Inventory Transfers’ folder specified in Company PDF/Export Directory (30-04) or By Term PDF/Export Directory (30-05) in order for the report to open correctly in Excel and successfully save to your computer.
