How To: Specifying the Invoice Criteria (11-10)
Overview
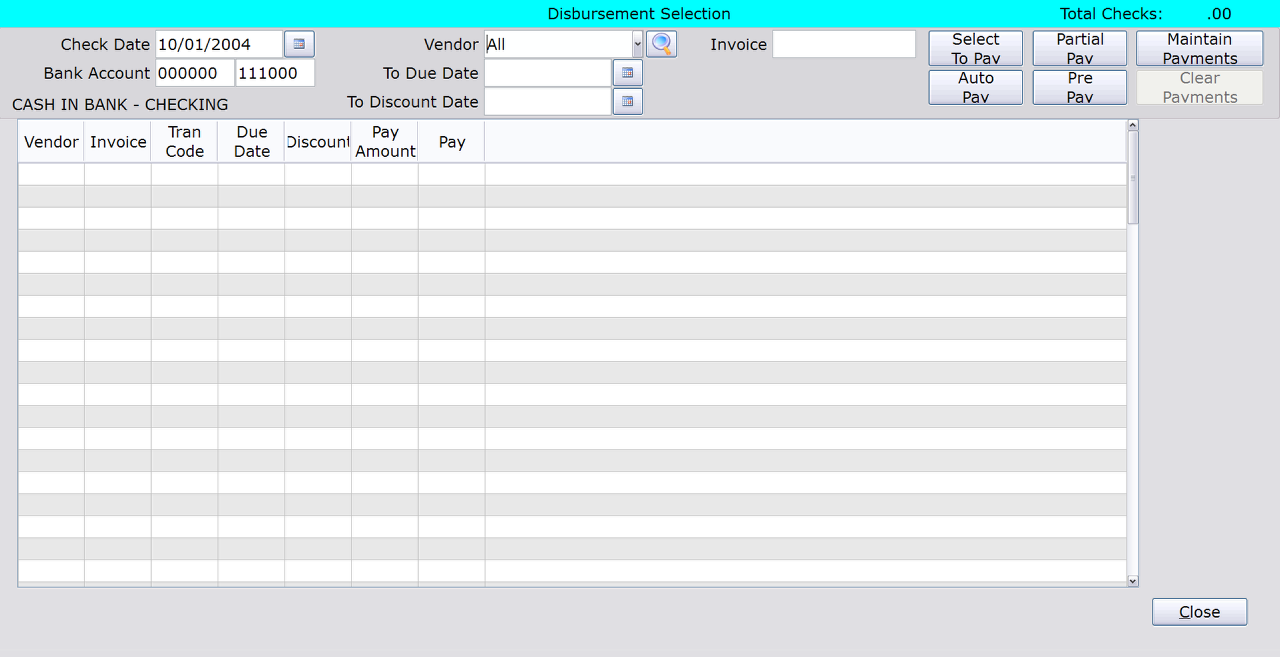
This tutorial describes how to enter the invoice select criteria on the A/P Disbursement Selection screen.
Video
Tip: Use the controls on the video player to watch in Full Screen mode, adjust the quality, or watch on YouTube.
Step-by-Step
IMPORTANT: You cannot access the fields on this screen until you accept or change the information in the ‘Check Date’ and ‘Bank Account’ fields. To accept the pre-prompted information, press the Tab key to move through the fields.
- In the ‘Check Date’ field, accept or change the date for these checks. Then press the Tab or Enter key.
- Click the icon to the right of the field to select the date from the calendar.
- By default, the G/L Account set up in the ‘Bank G/L Number’ field of Bank Preferences (11-90-02) appears in the ‘Bank Account’ field. Accept or change this number and press the Tab or Enter key.
- From the ‘Vendor’ drop-down list, select a vendor that is being paid. Select ‘All’ to include all vendors.
- Click the Search button to look up a vendor.
NOTE: Only vendors that currently have a balance due will be included.
NOTE: Vendors that have a Hold status do not appear in this list.
- In the ‘To Due Date’ field, enter the due date for the invoice or select it from the calendar (optional). Invoices with a due date on or before the entered date will be included.
- In the ‘To Discount Date’ field, enter the discount date for the invoice or select it from the calendar (optional). Invoices with a discount date on or before the entered date will be included.
REMEMBER: The system compares the date in the ‘Check Date’ field with the discount date to determine if the discount has been earned or lost.
- If you want to pay a specific invoice, enter the invoice number in the ‘Invoice’ field (optional). If you want to include all invoices that meet the select criteria, leave this field blank.
- At this point, you need to select one of the four payment options (described on the following pages):
- Select to Pay
- Auto Pay
- Partial Pay
- Pre-Pay
The Maintain Payments and Clear Payments options are used to unselect invoices after they have been selected for payment.
