How To: Re-Sequencing a Schedule (21-21)
Overview
This tutorial describes how to re-sequence a schedule using the Schedule Details selection.
Video
Tip: Use the controls on the video player to watch in Full Screen mode, adjust the quality, or watch on YouTube.
Step-by-Step
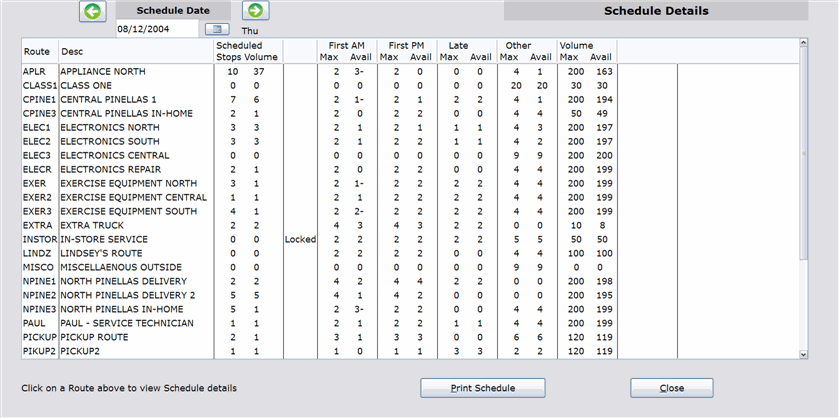
- On the initial screen of the selection, specify a schedule date using the green arrow buttons, the calendar button, or by entering the date in the field at the top of the screen. Today’s date appears by default.
- Route information appears for the specified date. Click on a route to view details for it.
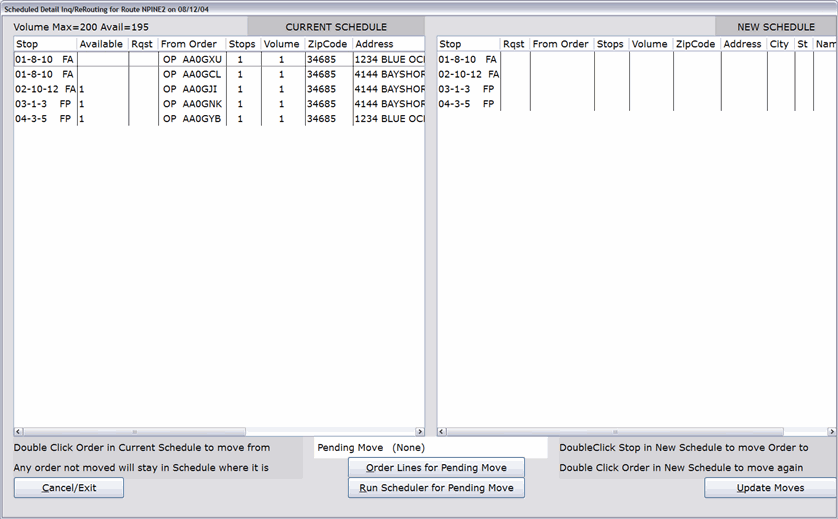
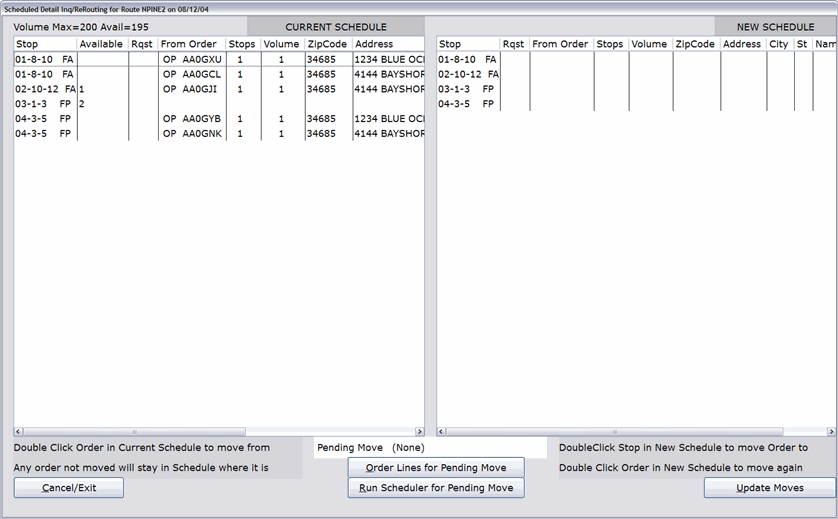
- The Schedule Details window opens. On the left side of the screen is the Current Schedule for the route, which displays all orders being delivered/serviced on the specified date. On the right side of the screen is the New Schedule box, which is used to re-sequence the deliveries/service for the day (if necessary).
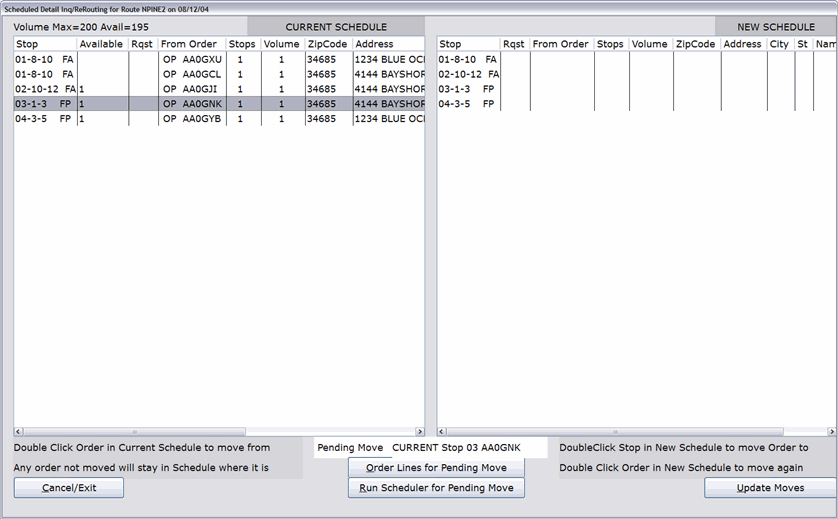
- In the Current Schedule box on the left side of the screen, double-click the ‘Stop’ that is being moved to another stop/time. For example, if you want to move the order assigned to Stop 3, to Stop 4, you would click Stop 3 on left side of the screen. The stop name and order number appear in the ‘Pending Move’ field at the bottom center of the screen.
NOTE: If an order takes up more than one stop/timeslot, a greater than character ‘>’ appears after the order number. A closing parenthesis character ‘)’ appears after the order number on each subsequent stop line to show that the same order is being carried over to that stop.
- You can open the selected order in the Scheduler by clicking the Run Scheduler for Pending Move button. Once the order is moved to the New Schedule box, you will not be able to do this.
- You view the lines on the order by clicking the Order Lines for Pending Move button. Then, by clicking on an item, you can view the Available, Committed, OnOrder quantities for the item at all branches.
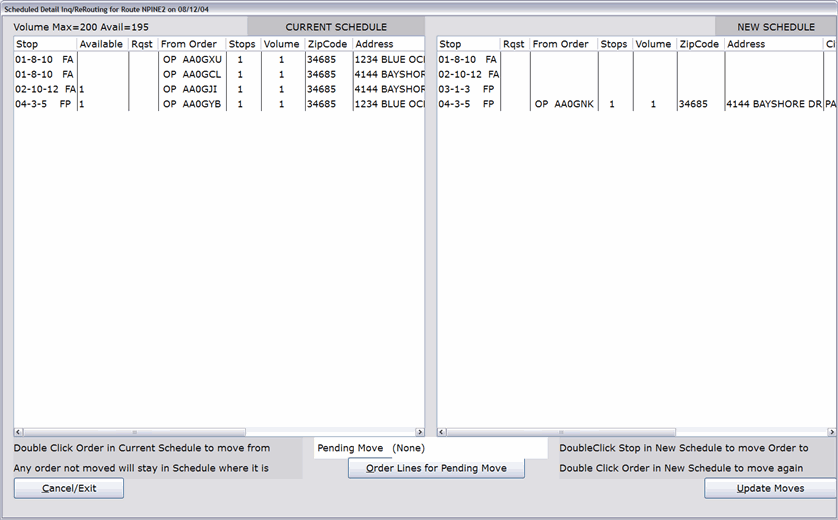
- In the New Schedule box on the right side of the screen, double-click the ‘Stop’ that you are moving the order to. Using the example from Step 4, you would double-click Stop 4.
- The Order is removed from the Current Schedule box and now appears in the New Schedule box.
NOTE: Once the order is in the New Schedule box, you can move it again by first double-clicking on the order to be moved (in the New Schedule box) and then double-clicking on the stop (again, in the New Schedule box) that you want to move it to.IMPORTANT: Remember that the Current Schedule box and the New Schedule box represent the entire route schedule for the day. Only orders that are being moved to a new stop/time appear in the New Schedule box. Orders that are not being changed, should remain in the Current Schedule box.
- Click the Update Moves button at the bottom of the screen to save the changes. The Schedule Details window closes.
- Click Cancel/Exit to disregard any changes made to the schedule.
- From the main screen, re-access the route to verify that the changes just made are reflected in the Current Schedule.
