How To: Printing Schedule Details (21-21)
Overview
This tutorial describes how to print schedule details.
Video
Tip: Use the controls on the video player to watch in Full Screen mode, adjust the quality, or watch on YouTube.
Step-by-Step
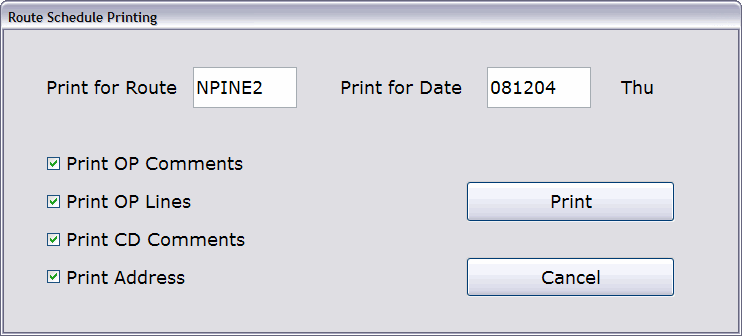
- Click the Print Schedule button. The Route Schedule Printing window opens.
- Accept or modify the route in the ‘Print for Route’ field.
- In the ‘Print for Date’ field, accept or modify the date. Today’s date appears by default.
- If you want to include Order Processing comments, Order Processing item lines, Centralized Delivery comments, and/or the customer’s address, check the appropriate boxes on the window.
- Click Print.
- Enter the ID of a physical printer or spooler at the ‘Select Printer’ prompt.
