How To: Using the Standard Calendar (21-25)
Overview
The Scheduler calendar is used to select a date, route, and stop for an order at the same time. The following steps describe how to use the Standard Calendar.
Video
Tip: Use the controls on the video player to watch in Full Screen mode, adjust the quality, or watch on YouTube.
Step-by-Step
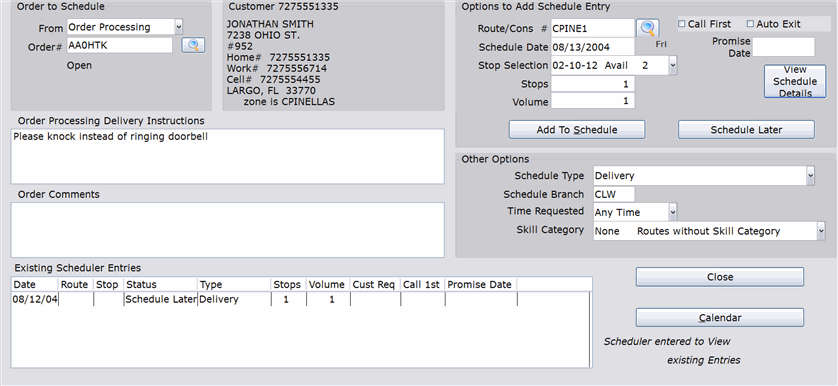
- Click the Calendar button on the Scheduler screen.
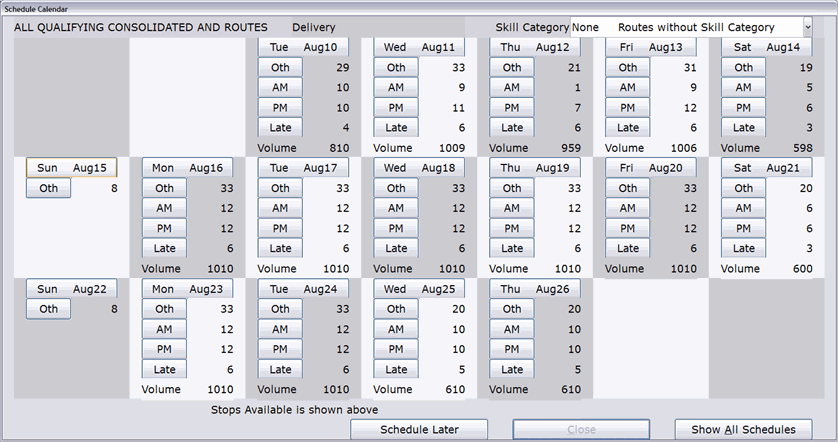
- The calendar opens in a new window, displaying available schedule dates. The calendar begins with the week containing today’s date (Start of Day date).
NOTE: If a route has already been selected in the ‘Route/Cons #’ field, the route name appears in the upper left corner of the window and only stops for that route will appear when the date button is clicked. Click the Show All Schedules button at the bottom of the window to include all routes that meet the criteria for the schedule. ‘All Qualifying Consolidated and Routes’ will then appear in the upper left corner of the window.
- If a skill is required for this schedule, select it from the ‘Skill Category’ drop-down list in the upper right corner. If one was already specified on the main Scheduler screen, it will automatically pre-prompt here.
- At this point, you have a few options:
- If you want to select the route and stop manually, click the date button (e.g. Mon Aug09, Tue Aug 10.). Then move to Step 5 of this tutorial.
- If you want the Scheduler to select the route/stop for you, click the Oth button. The ‘Schedule Calendar’ window closes and the route/stop selected by the system appears in the appropriate fields on the ‘Options to Add Schedule Entry’ box.
- If you want the Scheduler to select the route/stop for you, but you need to specify a 1st AM, 1st PM, or Late stop for the customer, click the AM, PM, or Late button, respectively. The ‘Schedule Calendar’ window closes and the route/stop selected by the system appears in the appropriate fields on the ‘Options to Add Schedule Entry’ box.
NOTE: If you are not using 1st AM/1st PM/Late stops (the ‘Use 1st AM/PM/Late Stops’ preference is checked) only the Oth button appears on the screen and this option is not available.
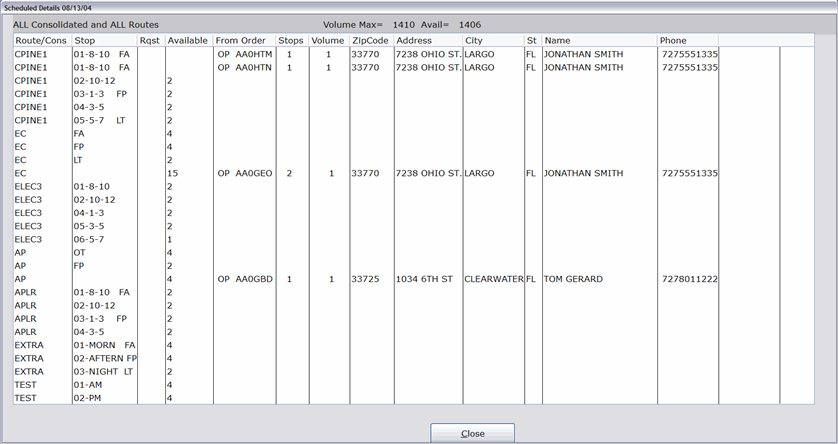
- The ‘Schedule Details’ for the selected date appear. Click on a route/stop to select it.
- Enter your Employee Number. The ‘Schedule Calendar’ window closes and the selected route/stop appears in the appropriate fields on the ‘Options to Add Schedule Entry’ box. Complete the scheduling process following the steps described in the ‘Using the Advanced Scheduler’ tutorial.


