How To: Changing Branch Settings (30-02-02)
Overview
This tutorial describes how to change the settings of existing branches.
Step-by-Step
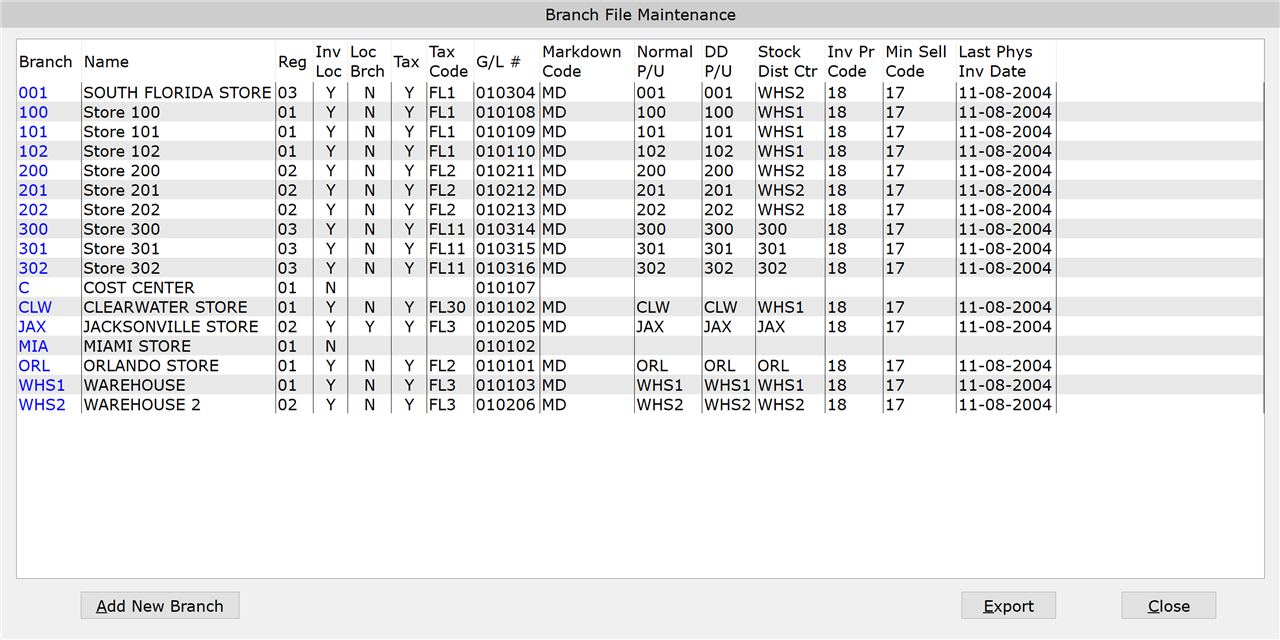
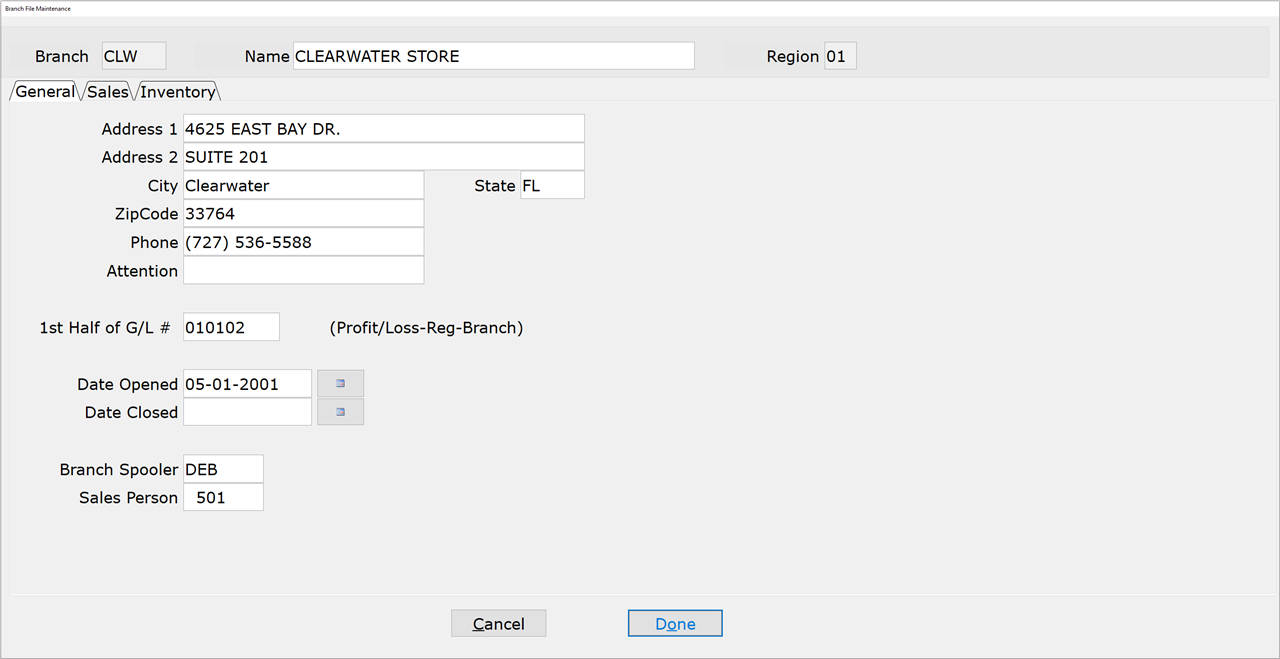
- Double-click the Branch ID being updated. The branch information appears.
- Update the following fields as necessary:
- The Salesperson (Employee) ID associated with the entered User ID will pre-prompt in the ‘Salesperson #1’ field of Point of Sale Entry.
- Type the word “BLANK” in this field and no Salesperson ID will appear in ‘Salesperson #1’ field.
- Click the ‘Done’ button to save the updates.
Header Tab
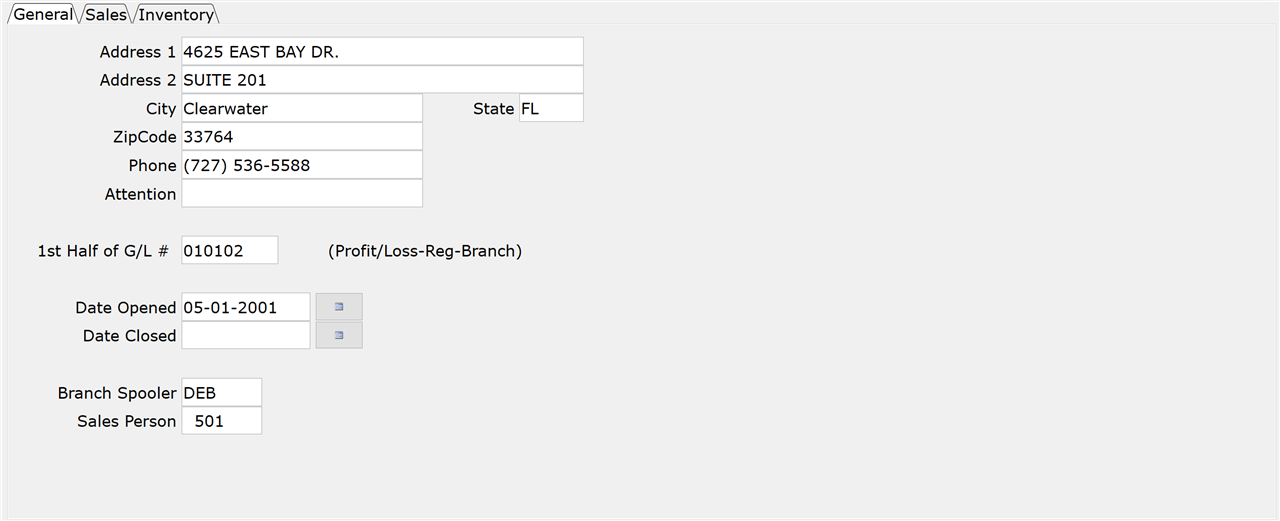
General Tab
We suggest that you assign each branch a different branch number, even if the branches are located in different regions.
Refer to the Overview section of the General Ledger documentation for more information on GL numbers.
Leave the field blank and no salesperson will appear in the ‘Sales Person #1’ field.
If User ID is turned on:
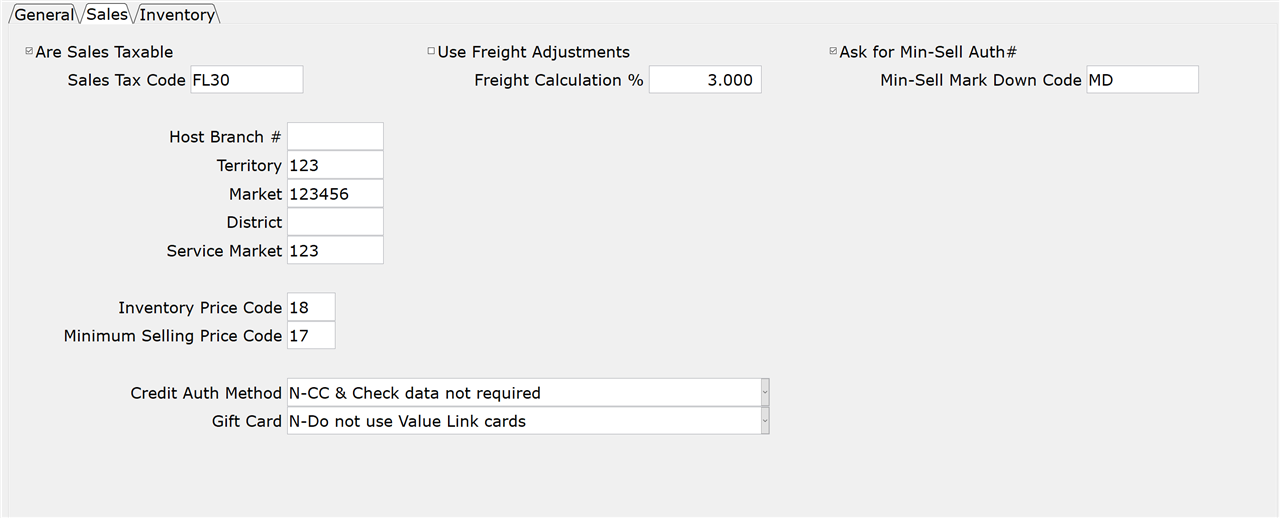
Sales Tab
Uncheck this box if sales are not normally taxable at this branch.
NOTE: An entry is required in this field for non-taxable branches since the tax code is used when printing the Sales Tax Report for Sales, Service, and Rental.
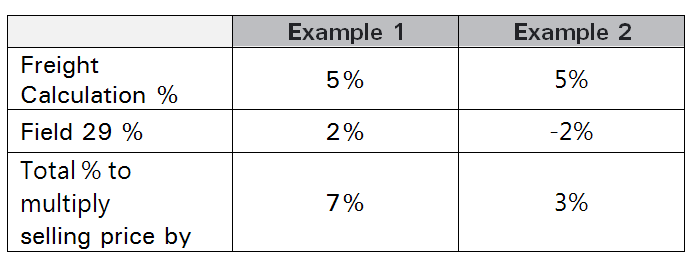
If no freight is to be calculated, leave this field blank.
If User ID is turned off, this setting is obsolete.
IMPORTANT: For more control of markdowns and price changes, please use Preferences 57 & 58 of Transaction Processing Preferences (02-18-01).
Each branch can have a different mark down code.
IMPORTANT: By default, the mark down code only needs to be entered once per sales transaction. For more control of markdowns and price changes, please use Preferences 57 & 58 of Transaction Processing Preferences (02-18-01).
If no mark down code is required for sales below the Minimum Selling Price, leave this field blank. All lines sold below minimum will be flagged with “?????” in the Markdown Code field and will be reported in the Markdown Control Report (05-35).
Currently this field is for informational purposes only.
Territories are set up in Market/District Maint (30-02-06).
Markets are set up in Market/District Maint (30-02-06).
Districts are set up in Market/District Maint (30-02-06).
NOTE: Currently, this field is for informational purposes only.
Accept or change the price field from Inventory Master File Inq/Maint (03-01) that is being used as the normal selling price for all inventory sold at this branch. The price codes in this field can range from 01 to 23, or it can be left blank.
Note that entries 1-15 represent pricing markets, not the actual fields of the Inventory Master File Inq/Maint screen. For example, if you enter “7” in this field, the system would use the selling price set up for Market 7. Market names are set up in the Market Pricing selection (03-90-03) and prices are assigned to the markets in Inventory Master Inq/Maint.
Entries 16-23 refer to the actual pricing fields of the Inventory Master File Inq/Maint (03-01) screen. For example, if you enter “18” in the field, the price set up in Field 18 is used as the normal selling price.
The normal selling price pre-prompts during POS Entry (02-02) and when adding a line to an order through Order Maintenance (02-08-03). It is also is used to calculate the ratio of the total selling price for any split or PKS package lines.
If the customer is paying for merchandise with their AR Open or Revolving account and their account has a price code assigned to it (through AR Master File Inq/Maint (12-20) or (13-20)), this price code overrides the price code set up in this field. This allows customers with special buying arrangements to purchase merchandise (with their AR account) in any of your branches under their predetermined buying arrangement.
Accept or change the price field from Inventory Master File Inq/Maint (03-01) that is being used as the minimum selling price for all inventory sold at this branch. The price codes in this field can range from 01 to 23, or it can be left blank.
As with the Inventory Price Code, entries 1-15 represent pricing markets, not the actual fields of the Inventory Master File Inq/Maint (03-01) screen. For example, if you enter “8” in this field, the system would use the minimum price set up for Market 8. Market names are set up in the Market Pricing selection (03-90-03) and prices are assigned to the markets in Inventory Master Inq/Maint.
Entries 16-23 refer to the actual pricing fields of the Inventory Master File Inq/Maint screen. For example, if you enter “16” in the field, the price set up in Field 16 is used as the minimum price.
This price is used for the Markdown Control for the branch. If this field is left blank, the system defaults to the value in Field 17 as the Minimum Selling Price. Non-inventory Product Types, however, will always have a minimum price equal to the line selling price.
Select “Y” and the entry of credit card and check information is required. However, this information is not authorized.
Select “N” and the entry of credit card and check information is not required.
Select “A” for the use of online authorization for both credit cards and checks. This option requires a check/credit card scanner. If a scanner is not available, you can use the Manual Override feature. If the scanner is not working, phone authorizations can be obtained.
Select “C” to use online authorization for credit cards only. This option required a credit card scanner. If a scanner is not available, you can use the Manual Override feature. If the scanner is not working, phone authorizations can be obtained.
Preferences “A” and “C” are part of the Credit Card Authorization licensed option.
Select “1” if Value Link gift cards are used in POS Entry.
Select “N” if you do not use Value Link gift cards.
Gift cards are part of a licensed option.
Inventory Tab
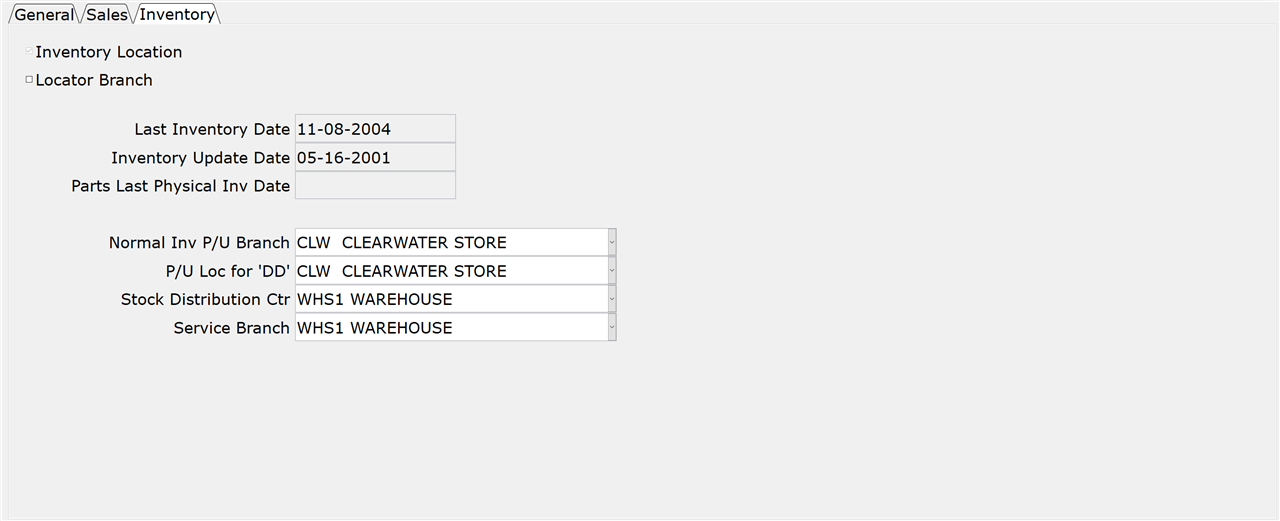
If the box is unchecked, the branch is a non-inventory location (e.g. Cost Center).
This field cannot be changed after initial setup.
IMPORTANT: All inventory branches must be set up by Tyler support.
All items, except those flagged in Field 33 of Inventory Master Inq/Maint (03-01) as locator exempt, will require a locator number to be entered when sold, received, adjusted, or transferred.
For Centralized Delivery installations, this location will usually be the normal warehouse location for the branch.
The P/U Loc For ‘DD’ is used as the warehouse in Order Processing. If the P/U Loc For ‘DD’ is blank, the Normal Inv P/U Location is used as the DD Pick-Up Location and the Stock Distribution Center.
The branch entered here appears in the Service Branch field of Work Order Entry (07-01).
