General Skill: Entering Payment Information
Overview
The Tender Entry window is used to enter the payment information for the transaction (after you enter all customer and merchandise information). Since this method of entering payment information is significantly different from the old version of POS, it requires some special attention.
Video
General Rules for the POS Screen
Customer Payments
When collecting payment for purchased merchandise, enter a positive number in the Amount field. The Total Due also appears as a positive number.
Refunds to the Customer
When money is being refunded to the customer (during a return or exchange), enter a negative number in the Amount field. The Total Due for the transaction also appears as a negative number.
Even Exchanges
For even exchange transactions, no dollars appear in the Total Due field. In this case, no input is required in the Amount field and you can simply click the Done button to move to the next step.
Step-by-Step
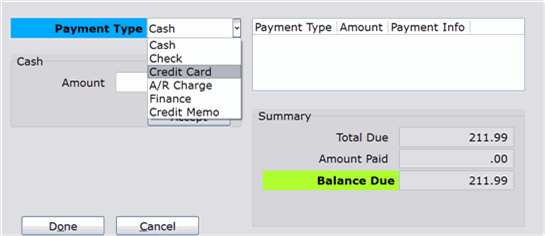
- Select the payment type from the drop-down menu.
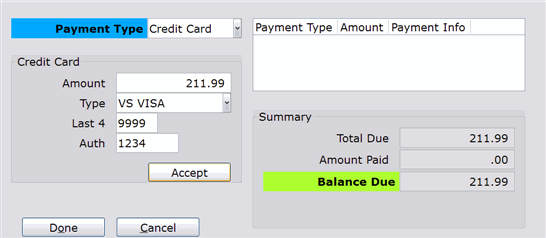
- Accept or modify the amount and then enter the other payment information (the fields that appear here vary based on the payment type). See the Field Definitions section of the document for more details about each field.
- Click Accept.
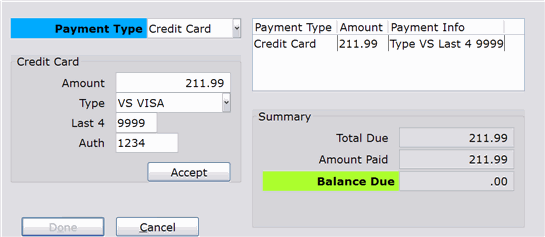
- The payment information appears in the Payment Register. If the payment satisfies the amount due for the transaction, “.00” appears in the Balance Due field.
- If you need to add more payments, repeat steps 1-3.
- If you need to modify a payment amount, click the payment to modify in the Payment Register and make the necessary changes in the Amount field; click Accept to apply.
- To delete a payment, click the payment to delete in the Payment Register. Then, clear the entry in the Amount field and click Accept. You will notice that payment is removed from the Payment Register.
- To split a payment between multiple payment types, repeat steps 1-3 for each separate payment type.
- Click Done.


