How To: Maintaining a Quote (RQ)
Overview
Many times a customer needs to make changes to a Quote Ticket after it is created. For example, the customer might need to replace one of the merchandise lines with a different product or simply delete a line from the Quote Ticket. The RQ transaction type is used to make these changes.
Video
Tip: Use the controls on the video player to watch in Full Screen mode, adjust the quality, or watch on YouTube.
Step-by-Step
Scenario: A customer returns to your store to add an item to a quote that was created during an earlier visit.
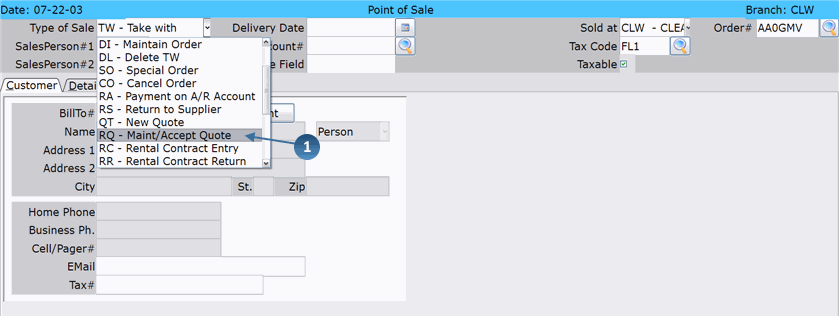
- Select ‘RQ–Maint/Accept Quote’ from the Type of Sale drop-down menu.
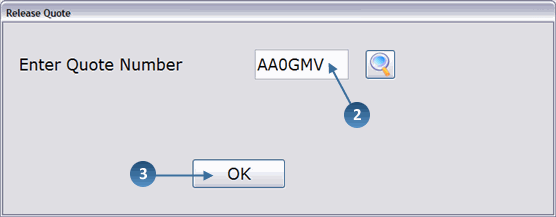
- Enter the Quote Number or use the Search button to find the customer’s quote.
- Click OK.
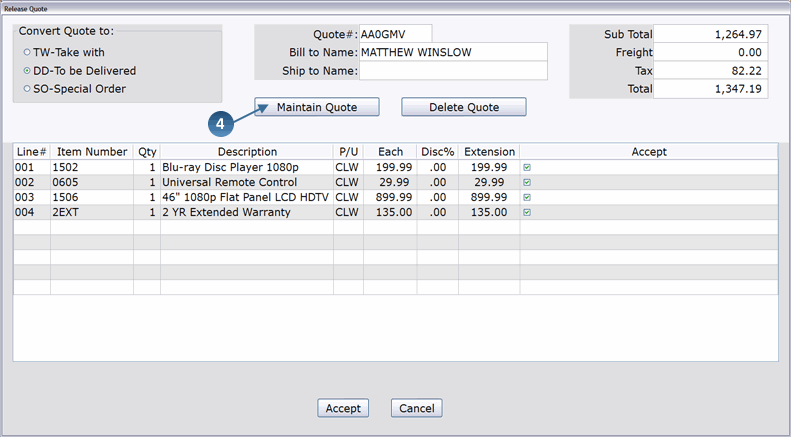
- The Release Quote window appears. Click the Maintain Quote button to make changes to this quote.
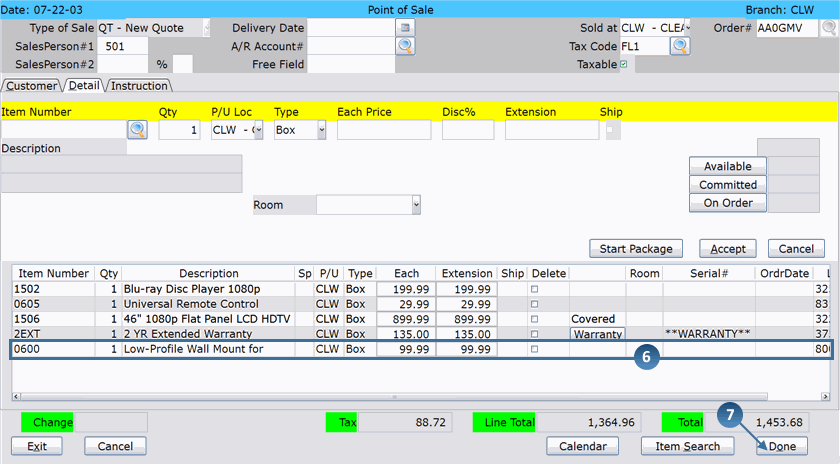
- The Quote Ticket appears.
- Make any necessary changes to the transaction (add/delete merchandise, modify the customer information, etc.). In this example, new merchandise has been added to the ticket.
IMPORTANT: If you decide that you do not want to make any changes to the quote but still want to keep it, press the Done button. Pressing the Exit or the Cancel button will erase the quote from the system.
- When you are finished making changes, click Done to save them.
- Depending on how your Invoice Preferences (02-18-01, Field 8) are set up, one of the following now occurs:
- The invoice is automatically printed
- Invoice print is automatically skipped
- You can choose to print or not print the invoice


