How To: Creating a Purchase Order (04-01)
Overview
This tutorial describes how to create a purchase order.
Video
Tip: Use the controls on the video player to watch in Full Screen mode, adjust the quality, or watch on YouTube.
Step-by-Step
- Enter your Employee Number in the ‘Employee Number’ field.
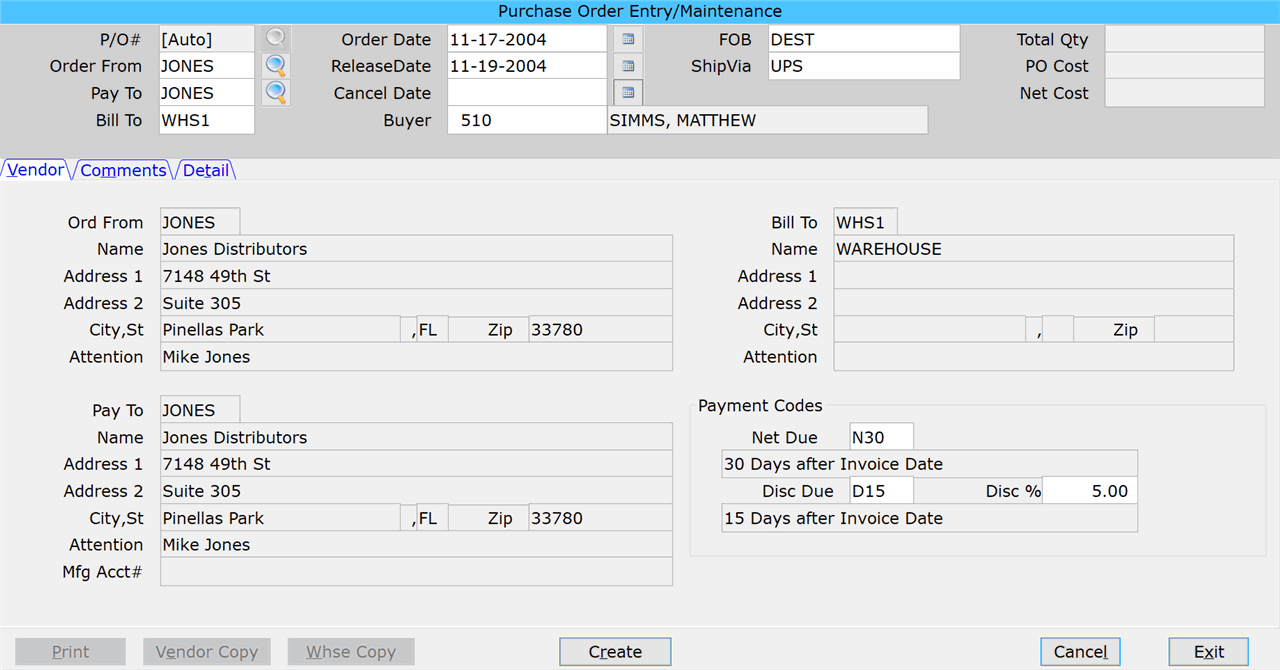
- In the ‘P/O #’ field, enter the purchase order number.
If the ‘Auto Generate P/O’ field is set to ‘Y’ in Purchase Order Preferences (04-90), ‘[Auto]’ appears in this field and it cannot be changed.
- In the ‘Order From’ field, enter the vendor the merchandise is being ordered from. Or click the search button to look up the vendor.
- If there is a Purchase Order Address set up for the vendor in the Vendor P/O Address Maint selection (04-51), it will appear in the Ordered From section of this screen. If not, the address from A/P Vendor Master (11-30) displays.
- In the ‘Pay To’ field, accept or modify the Pay To vendor for the purchase order.
- The vendor entered in the ‘Pay To Vendor’ field of A/P Vendor Master appears in this field by default.
- In the ‘Bill To’ field, accept or modify the branch being billed for the purchase order.
- The branch entered in the ‘Bill To Branch ID #’ field of Purchase Order Preferences appears in this field by default.
- In the ‘Order Date’ field, enter the date on which the merchandise is being ordered or select it from the calendar.
- In the ‘Release Date’ field, enter the date on which the vendor should release the merchandise or select it from the calendar.
- In the ‘Cancel Date’ field, enter the date on which the vendor should cancel the purchase order if items have not been shipped (optional).
- In the ‘Buyer’ field, accept or modify the buyer (employee number) for the purchase order.
- The employee number entered in the ‘Buyer’s ID #’ field of Purchase Order Preferences appears in this field by default.
- In the ‘FOB’ field, accept or modify the Freight on Board. Enter “DEST” if the freight or shipping charges are paid by the vendor. Enter “SHIP” if the freight or shipping charges are paid by your company.
The system uses this information to determine whether freight charges will be included in the inventory net cost on the purchase order detail lines.
- The FOB entered in the ‘FOB (Ship/Dest/)’ field of Purchase Order Preferences appears in this field by default.
- In the ‘Net Due’, accept or modify the payment terms for the vendor. For more information, please see the Payment Codes section of this document.
- The entry in the ‘Terms’ field of A/P Vendor Master appears in this field by default.
- In the ‘Disc Due’ field, accept or modify the discount terms for the vendor. For more information, please see the Payment Codes section of this document.
- In the ‘Disc %’ fields, accept or modify the discount percentage for the vendor. For more information, please see the Payment Codes section of this document.
- Click the ‘Create’ button at the bottom of the screen to create the purchase order.
- Click the Comments tab (optional).
In the ‘Comment’ field:
- Enter a comment for the purchase order.
- Check the ‘Print on Vendor Copy’ box to include the comment on the Vendor Copy.
- Click the ‘Accept’ button. The comment appears in the box below.
- Repeat Steps 1-3 until all comments have been added to the purchase order.
- To change a comment, click on it, make the necessary changes, and then click ‘Update.’
- To delete a comment, click on it. Then click the ‘Delete’ button and click ‘Yes’ at the ‘Are you sure you want delete?’ prompt.
- Click the Detail tab.
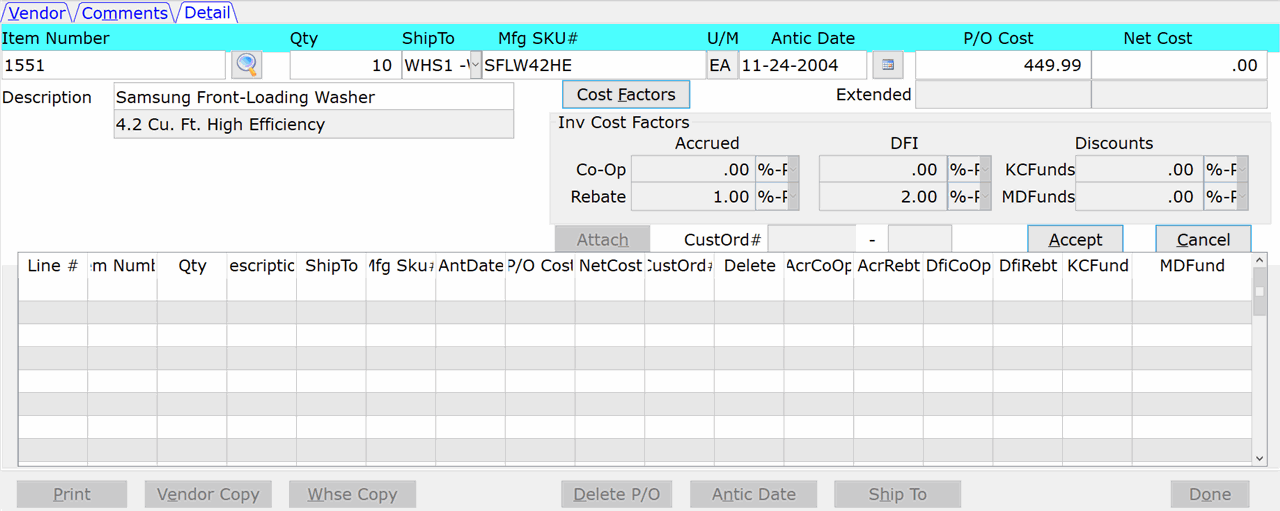
- In the ‘Item Number’ field, enter the item number, SKU, or barcode number for the first item on the purchase order. Or click the search button to look up an item.
If you need to manually attach an item from an order in Order Processing or a Work Order in Service Department Automation:
- Click the ‘Attach’ button.
- Click the ‘Order Processing’ or ‘Work Order’ radio button.
- Enter the Order Processing or Work Order number.
- Enter the detail line from the order or workorder that you are attaching to this purchase order.
- Verify the information for the item is correct and click ‘Accept.’
- Skip to Step 31 of this tutorial.
- In the Description field, accept or modify the item description.
- If you need more room for the description, enter a “~” anywhere in the description and four new lines appear.
- In the ‘Qty’ field, accept or modify the quantity being ordered.
- In the ‘Ship To’ field:
- If the item is being shipped to a single branch, select the branch that the item is being shipped to.
- If the item is being shipped to multiple branches, select the ‘****-Multiple Branches’ option at the top of the list.
- In the ‘MFG SKU’ field, accept or modify the MFG SKU.
- The SKU from Inventory Master appears by default.
- In the ‘Antic Date’ field, enter the anticipated receiving date for the item or select it from the calendar.
- In the ‘PO Cost’ field, accept or modify the PO Cost for the item.
- The cost from the ‘Last PO Cost’ field in Inventory Master appears in this field by default.
- Click the ‘Cost Factors’ button or press Tab in the ‘PO Cost’ field to open the Cost Factors window.
- Accept or modify the amounts in the Cost Factor fields. Please see the ‘Entering Cost Factors‘ tutorial for more information.
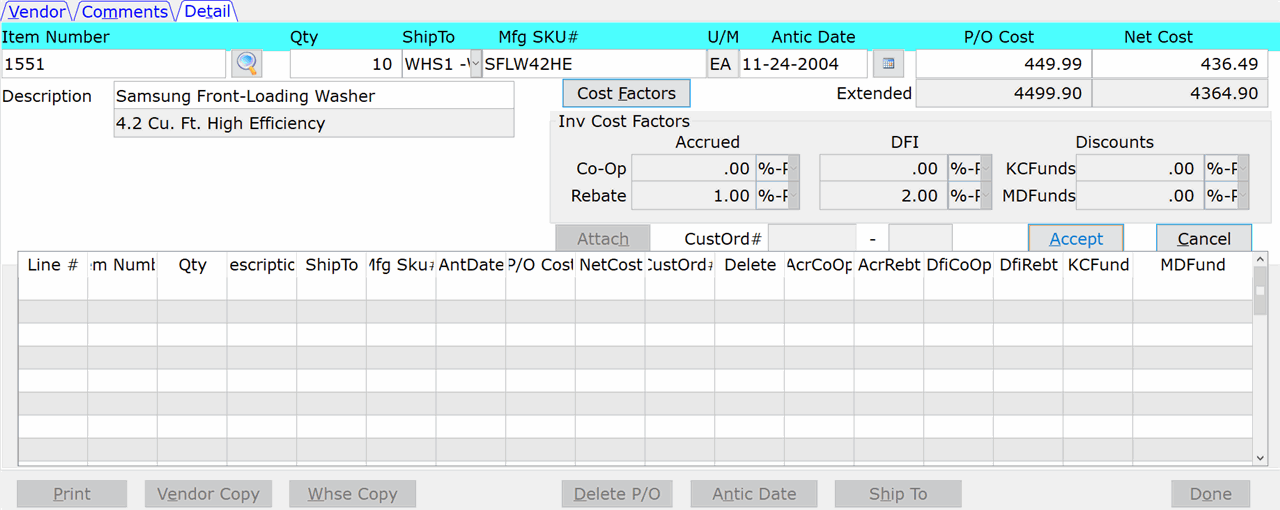
NOTE: The Net Cost will not appear on the purchase order until you verify the amounts in these fields.
- The Net Cost appears in the ‘Net Cost’ field. You can change the Net Cost if necessary, but we recommend leaving it as is.
- Click ‘Accept’ to add the item to the purchase order.
- Click ‘Cancel’ to clear the line.
- This step is different based on your selection in the ‘Ship To’ field:
- If the items are being shipped to a single branch, skip to Step 30 of this tutorial.
- If items are being shipped to multiple branches, move to the next step in this tutorial.
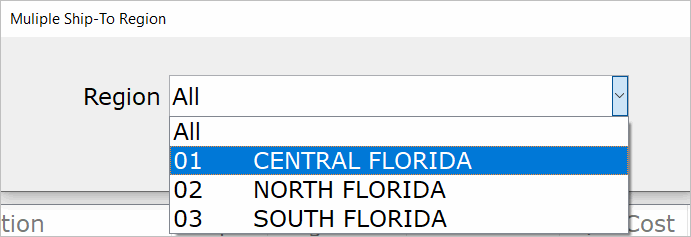
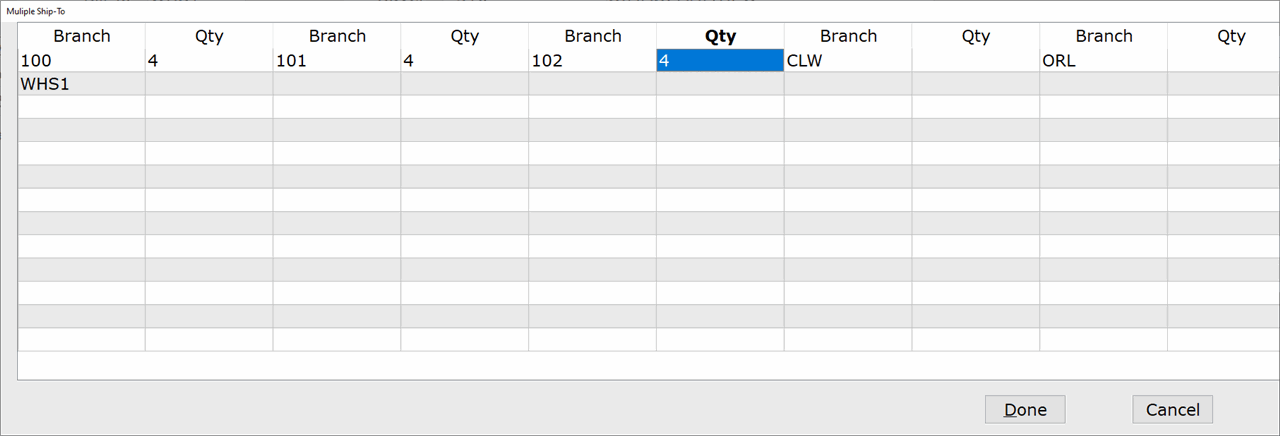
- The Multiple Ship-To Region window opens:
- Select a region to ship the items to or select ‘All’ to ship to branches in all regions.
- Click ‘Done.’
- Click inside the ‘Qty’ field next to a branch and enter the quantity of the item being shipped to that branch. Repeat this process until quantities have been entered for all branches that you are ordering items for.
NOTE: The total quantity entered (for all branches) cannot exceed the amount entered in the ‘Qty’ field on the Detail tab of the purchase order.
- Repeat steps 18-29 until all items are added to the purchase order.
- Click ‘Done.’
NOTE: If you need to make changes to this purchase order, please see the ‘Changing an Existing Purchase Order’ tutorial.
- Click ‘Print’ to print a copy of the purchase order (optional).
NOTE: This is not the PO Audit. If the ‘Entry Print – Audit Report’ preference is set to ‘Y’ in PO Preferences (04-90), you will still need to print the audit through the Print – Audit selection (04-02) before receiving the PO through Receiving Entry (04-11).
- From the ‘Print Cost’ drop-down list:
- Select ‘No Cost’ and no cost will be included on the print.
- Select ‘PO Cost’ to include the PO Cost on the print.
- Click ‘Accept.’
- At the ‘Select Printer’ prompt, enter the ID of a physical printer or enter “PDF” to save the report to a PDF file. If printing to PDF, accept the filename and click ‘Ok.’
IMPORTANT: When printing to PDF, you must have a ‘Purchase Order’ folder specified in Company PDF/Export Directory (30-04) or By Term PDF/Export Directory (30-05) in order for the PDF to save successfully to your computer.

